
Styling guide
Curl Styler Brush Guide: How to Choose and Use the Right Brush
A curl styler brush can create lifted roots, polished ends, soft bends, or a loose, blowout-style curl—but the result depends as much on brush shape, section size, direction, and release technique as it does on the tool itself. The short answer: choose a smaller round brush when you want more control and a tighter bend, and a larger round or oval brush when you want broader movement, smoothing, and volume. Then work on partially dried, detangled hair in manageable sections instead of winding a large amount of wet hair tightly around the brush.

What is a curl styler brush?
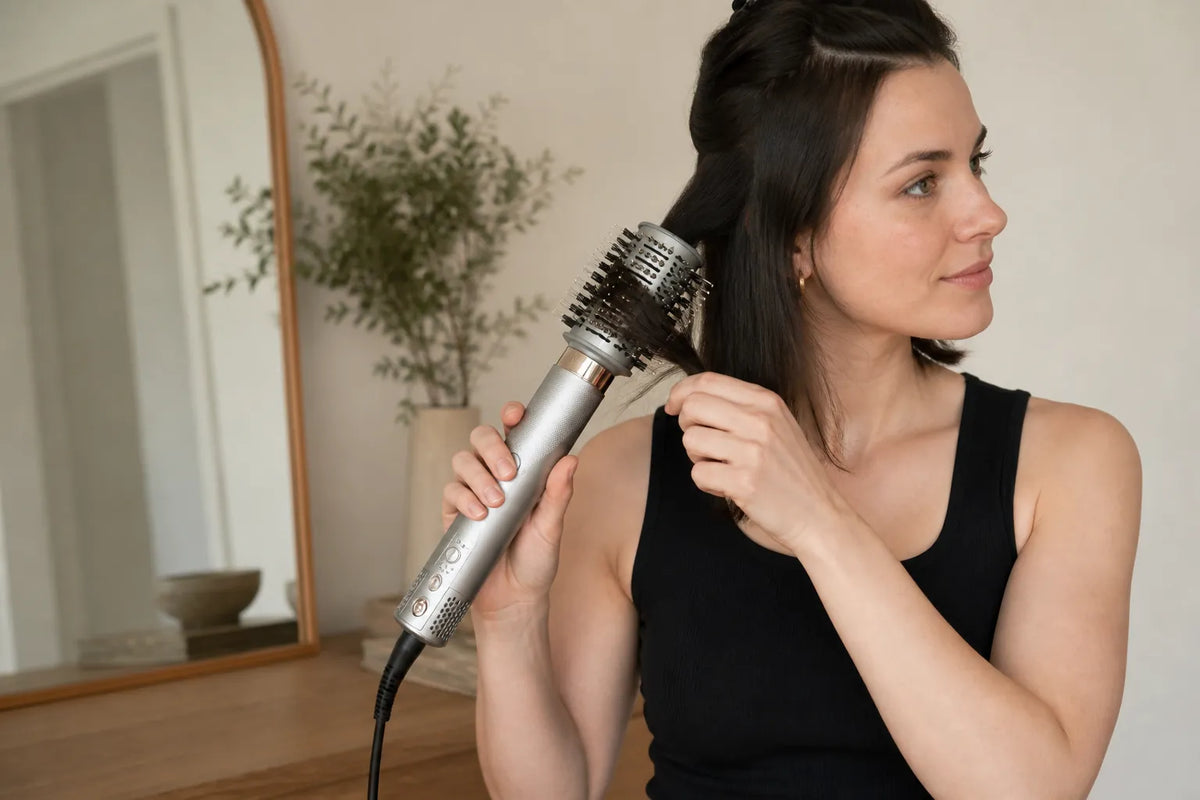
A curl styler brush is a heated or hot-air styling brush designed to shape hair while the bristles guide and hold a section. Unlike a manual round brush, a powered hot-air brush supplies its own airflow, so you do not have to coordinate a separate dryer and brush. Unlike a curling barrel, it normally produces a stretched, brushed-out bend rather than a compact spiral.
That distinction matters. If your goal is a smooth blowout, rounded ends, airy face framing, or lift at the roots, a brush attachment is often the direct route. If you want a more defined ringlet, a dedicated curling barrel may be the more suitable attachment. A brush can still create curl and movement, especially on shorter sections or around the ends, but its strength is controlled volume and softness.
How to choose the right curl styler brush
Do not judge a brush by its diameter alone. Shape, bristles, vents, and the tool's controls all affect how easily you can grip, heat, shape, and release the hair.
1. Round versus oval shape
A cylindrical round brush makes it easier to roll the hair through a curve. It suits fringe, shorter layers, inward or outward ends, and sections where you want a more visible bend. An oval brush creates a wider contact surface. It is usually better suited to broad root lift, smoothing longer sections, and creating a fuller blowout silhouette without forming a tight curl.
2. Smaller versus larger diameter
A smaller brush forms a smaller curve, which gives you more control on short hair, bangs, and face-framing layers. It can also add a stronger curl at the ends of longer hair. A larger brush creates a gentler curve. It is useful when you want loose movement, a smooth finish, or volume across longer sections.
Manufacturers do not all measure or name brush sizes in the same way. Treat “small,” “medium,” and “large” as relative descriptions within a specific product line, and check the actual dimensions if precise fit matters to you.
3. Bristle layout and venting
Mixed or staggered bristles can help separate strands and maintain light tension. Widely spaced bristles may pass more easily through dense sections, while densely packed bristles may give finer sections more control. Vents allow air to move through the brush instead of concentrating at one point. Whatever the design, the brush should move without snagging when you test it on a small, cool section.
4. Airflow, heat, and a cool setting
Multiple airflow or heat options make it easier to adjust for section thickness and hair condition. Start low and increase only if needed. A cool-shot function is useful after shaping because it lets the section cool closer to its styled position. It does not “lock” every hair type permanently, but it can help a bend or lifted root settle before you release or disturb it.

Match the brush to your hair length, density, and goal
| Hair or styling goal | Useful starting point | Technique note |
|---|---|---|
| Pixie layers or fringe | Smaller round brush | Use narrow sections and a partial roll so short ends do not wrap around the brush repeatedly. |
| Bob or chin-length hair | Small-to-medium round brush | Roll under for an inward bend or over the section for an outward flip. |
| Shoulder-length hair | Medium round brush | Work through the mid-lengths, then finish with one controlled turn at the ends. |
| Long hair | Larger oval brush for volume; smaller round brush for ends | Use more zones, not oversized sections. Let each section cool before blending. |
| Fine or fragile-feeling hair | Brush that grips without pulling | Begin with a low setting, reduce passes, and keep the brush moving. |
| Thick or dense hair | Vented brush with manageable bristle spacing | Divide the hair into extra zones so airflow can reach each section evenly. |
| Root lift | Oval or medium round brush | Lift the section away from the scalp before directing the brush up and back. |
| Visible bend or face framing | Smaller round brush | Turn away from the face and release by unwinding instead of pulling straight down. |
These are starting points, not rigid rules. Haircut, porosity, previous chemical services, humidity, and product use can change the result. Test one section first and adjust the setting, section width, or brush choice before styling the whole head.
How to use a curl styler brush step by step
The most reliable routine is based on preparation, controlled sections, and a clean release. Rushing any one of those stages can turn a smooth bend into frizz or a tangle.
- Partially dry your hair. Towel-blot gently and allow excess moisture to leave the hair. A hot-air brush is for drying and shaping, but starting on dripping-wet hair makes the process slower and can encourage repeated heat passes. Follow your tool manufacturer's wet-versus-dry guidance.
- Detangle before switching on. Start at the ends and work upward with a wide-tooth comb or a detangling method appropriate for your hair. The powered brush should shape an already organized section, not force through knots.
- Apply heat protectant as directed. Distribute it evenly and avoid soaking the roots. If you use mousse or another styling product, keep the amount light enough that the bristles and vents do not become coated quickly.
- Attach the brush while the tool is off and cool. Make sure the attachment is fully seated and locked according to the manual. Never force a connector or change an attachment while it is hot.
- Divide the hair into four to six zones. Clip away everything except the section you are styling. Dense hair may need more zones. Each working section should be narrower than the brush and thin enough for airflow to pass through it.
- Pre-dry if the section is still very damp. Use the appropriate drying attachment or direct airflow along the section until it is damp rather than wet. For more ideas on preparation and lift, see our guide to adding volume to flat roots.
- Place, tension, and move. Position the brush under or over the section depending on your desired direction. Use only enough tension to keep the section aligned. Move steadily through the mid-lengths; do not hold high heat on one spot.
- Shape with a partial roll. At the ends, rotate the brush about half to one turn. Avoid repeatedly winding the full length around the head. If the hair begins to bunch, stop, switch off, and unwind gently.
- Cool and release. Use cool shot if your tool provides it, then unwind the brush in the reverse direction. Let the section cool without combing it immediately. Once all sections have cooled, separate them lightly with your fingers.

Direction guide: change the brush movement, change the finish
For rounded-under ends
Place the brush underneath the section, glide toward the ends, and turn inward about half a rotation. Keep the ends together as they enter the bristles so they do not fan out or fold.
For an outward flip
Work with the brush above the section or rotate upward at the ends. Use a smaller section than you would for smoothing; that keeps the bend deliberate instead of barely visible.
For root volume
Lift the section roughly perpendicular to the scalp, place the brush beneath the root area without pressing into the scalp, and direct the section up and slightly back. Cool it in the lifted position before moving on. If you want a softer, airy result, our guide to fluffy hair without frizz explains how preparation and finishing affect the look.
For open face-framing movement
Guide the front sections away from the face. Keep the roll open rather than winding it into a tight coil. Release backward, let it cool, and then place it with your fingers.
For a loose blowout curl
Choose a smaller round brush, work with narrow sections, and create a controlled bend through the mid-lengths and ends. Alternate directions farther from the face if you want softer movement and less uniformity. For more defined curls rather than brushed bends, read how to make straight hair curly.
Eight common curl styler brush mistakes
- Starting with hair that is too wet. This lengthens drying time and often leads to extra passes.
- Taking sections wider than the brush. The center may stay damp while the outer strands receive more heat.
- Wrapping the hair around the brush several times. Multiple turns make release harder and increase the chance of tangling.
- Using force as a substitute for detangling. Stop if you feel resistance. Switch off the tool and release the section gently.
- Starting at the highest setting. Begin low and increase only when a small test section shows that more airflow or heat is needed.
- Ignoring the ends. Guide the ends into the bristles before rolling so they do not kink or split into different directions.
- Skipping the cooling stage. Brushing through a warm section immediately can pull out the bend you just created.
- Forgetting maintenance. Remove shed hair from a cool, unplugged brush and clean the inlet filter as the manufacturer directs. Restricted airflow can reduce performance.
Using brush attachments with the NuvyCare Vorta Multi-Styler
The NuvyCare Vorta 5 in 1 Multi-Styler combines drying, curling, smoothing, and volumizing functions in one compact system. Its current product page lists three airflow speeds, a cool-shot function, LayerStream™ airflow technology, and a detachable inlet filter. Those controls support the core method in this guide: choose the brush form for the finish, start conservatively, shape a manageable section, cool it, and release without pulling.
Official product imagery shows both a broader brush form and a smaller cylindrical round-brush form. Exact included pieces can change by market or package, so confirm the current product-page images and box contents before purchasing rather than relying on a generic attachment list. You can also compare the wider range in the NuvyCare styling collection.
If you already own the Vorta, use the lock and release mechanism exactly as described in your manual. Attach or remove components only when the unit is switched off, unplugged, and cool. Clean hair from the brush and service the detachable filter regularly so airflow remains unobstructed.
Quick pre-styling checklist
- Hair is detangled, partially dry, and protected for heat styling.
- The brush shape matches the result: smaller and rounder for control; larger or oval for broader volume.
- The attachment is locked onto a cool, switched-off tool.
- Sections are narrower than the brush and thin enough for airflow.
- The setting starts low and is increased only if needed.
- Each section is rolled no more than necessary, cooled, and unwound gently.
Once those basics are consistent, styling becomes less about fighting the brush and more about deliberately choosing the direction and scale of each bend.
Frequently asked questions
What is a curl styler brush?
A curl styler brush is a heated or hot-air brush that guides, dries, and shapes a section at the same time. It is best suited to root lift, smooth bends, rounded ends, and loose blowout-style curls rather than tight ringlets.
Which curl styler brush size should I choose?
Choose a smaller round brush for short hair, fringe, face-framing layers, or a stronger bend. Choose a larger round or oval brush for long sections, smoothing, broad movement, and volume. Use the product's actual measurements when available because size labels vary by brand.
Can a curl styler brush create real curls?
It can create loose curls, bends, and a blowout finish, especially with a smaller brush and narrow sections. A curling barrel is usually better for a defined spiral. Hair type, haircut, humidity, and the way each section cools will affect hold.
Should hair be wet or dry before using a hot-air brush?
Follow the manufacturer's instructions for your tool. In general, begin with detangled, towel-blotted, partially dried hair rather than dripping-wet hair. Starting less wet reduces drying time and the need for repeated heat passes.
How do I stop hair tangling in a curl styler brush?
Detangle first, use sections narrower than the brush, keep the ends aligned, and roll only about half to one turn. Release by unwinding in reverse instead of pulling the brush straight through. If hair bunches or snags, switch the tool off before gently freeing it.
Is a round brush or oval brush better for volume?
An oval brush is often easier for broad root lift and fuller volume across longer sections. A round brush gives more localized lift and a stronger curve, which can work well on shorter layers or around the crown. Technique and section size matter as much as shape.
Share:
Best Hair Straightener for Thick Hair: Features That Actually Matter
Mustache Shaver Guide: How to Get Clean Edges Without Irritation