
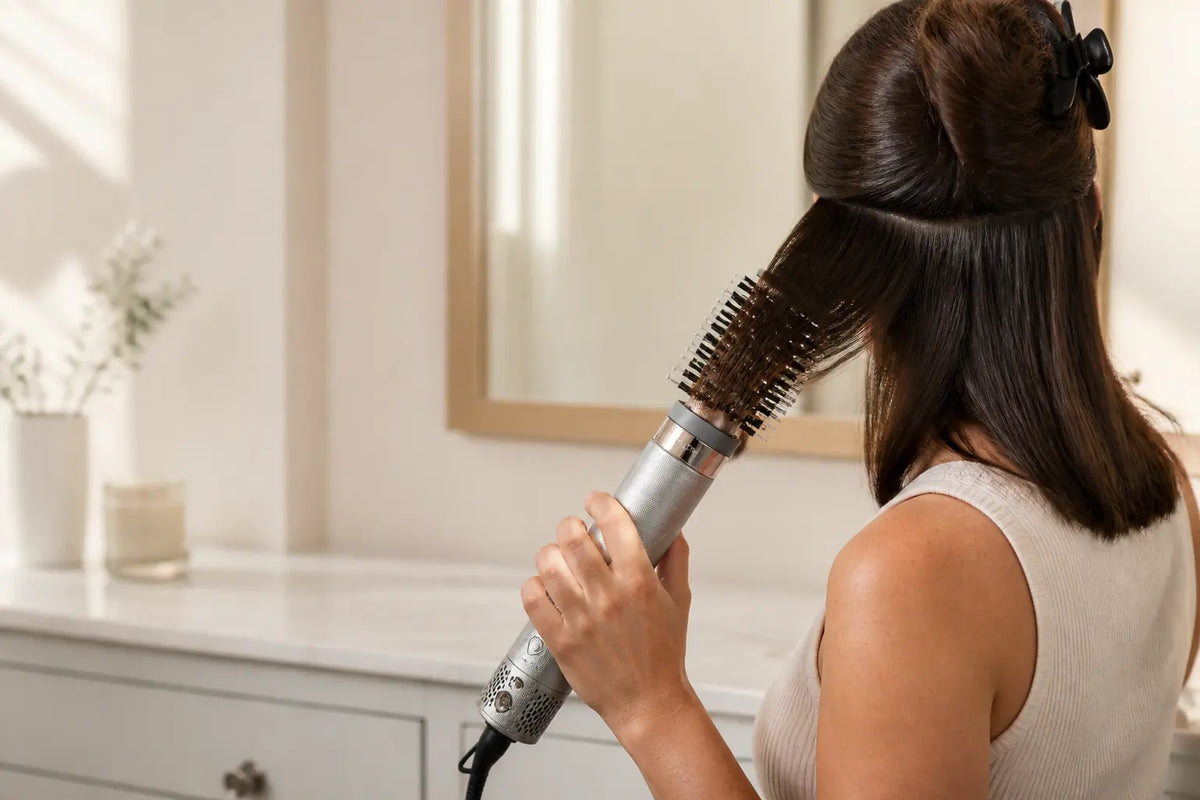
AT-HOME BLOWOUT TECHNIQUE
Round Brush Blowout: A Step-by-Step At-Home Technique
A polished round brush blowout comes from a repeatable sequence: remove excess water, detangle gently, divide the hair into manageable sections, lift at the roots, guide the mid-lengths with steady tension, shape the ends, and let every section cool before touching it. You can follow that sequence with a separate dryer and round brush or with a hot-air brush attachment. The tool changes; the fundamentals do not.

How to Do a Round Brush Blowout: The Quick Answer
Start with clean, conditioned hair that has been towel-blotted rather than rubbed. Detangle from the ends upward, apply a heat protectant according to its label, and remove enough moisture that the hair is damp instead of dripping. Divide the hair horizontally, clip away everything except a narrow working section, and begin near the nape.
Place the round brush beneath the section close to the roots. Lift the hair away from the scalp, direct airflow along the hair toward the ends, and move the brush and airflow together. Do not hold concentrated heat in one place. Once the roots and mid-lengths are dry, rotate the brush slightly through the ends to create the desired curve. Finish with cooler air if your tool provides it, then release the section without pulling it apart while it is still warm.
This article is about the full blowout workflow. If you are still deciding between a round and oval attachment, or between smaller and larger brush forms, read the separate curl styler brush guide. For a definition of the finished look rather than the technique, see what a blowout hairstyle is.
Before You Start: Set Up the Hair, Brush, and Airflow
The fastest-looking shortcut is often the reason a home blowout becomes slow: starting with hair that is too wet, tangled, or divided into oversized sections. A few minutes of preparation make the brush easier to move and reduce the temptation to repeat the same pass.
1. Remove excess water without rough friction
After washing and conditioning, gently squeeze out water and wrap the hair in a soft towel or T-shirt. Avoid aggressive rubbing. The American Academy of Dermatology recommends gentle handling because wet hair is more delicate, and it advises limiting excessive heat and choosing low or medium settings when appropriate. See the AAD’s healthy hair tips and styling guidance for the broader care context.
2. Detangle before the brush starts shaping
Use a wide-tooth comb or a detangling tool suited to your hair. Begin at the ends, then work gradually upward. A round brush should shape an organized section; it should not be asked to pull through knots. If the brush snags, stop the tool, unwind or release the hair carefully, and detangle again instead of forcing the section through.
3. Apply only the products the routine needs
Use a heat protectant according to its directions. Add a lightweight styling product only if it suits your hair and desired finish. Heavy creams, oils, or too much hold product can make fine hair collapse or cause the section to separate unevenly across the brush. Keep most finishing oil away from the roots, and add it after styling rather than coating the hair heavily before drying.
4. Choose a practical starting moisture level
For a separate dryer-and-brush method, many people rough-dry first so the roots and lengths are no longer saturated. For a hot-air brush or multi-styler, follow the manufacturer’s approved starting condition. “Damp” should not automatically be interpreted as dripping wet. The goal is to have enough moisture for shaping while avoiding long, repeated exposure on one section.
5. Match the brush to the section
A smaller round brush gives more localized control and a stronger bend. A larger round or oval brush creates a broader curve and a fuller silhouette. Whatever diameter you choose, the section should sit across the working surface without spilling far beyond both edges. If hair bunches at the sides, reduce the section before increasing tension.

Round Brush Blowout Step by Step
Step 1: Create clean horizontal sections
Part the hair from ear to ear and clip the upper layers away. Begin at the nape, where you can learn the rhythm before reaching the visible crown and face-framing pieces. Within that lower layer, take a working section that is slightly narrower than the brush head. Keep the parting clean so loose hair does not catch around the bristles.
Section thickness matters as much as width. A very thick section may feel dry on the surface while remaining damp inside. If you repeatedly pass over a section without the roots drying, divide it horizontally and work with less hair.
Step 2: Dry and lift the root area first
Place the brush under the section close to the scalp without pressing a hot surface into the skin. Lift the hair upward and slightly forward, creating space between the roots and the head. Direct the airflow along the section instead of blowing upward against the cuticle. With a separate dryer, keep the nozzle aligned above the brush; with an integrated hot-air brush, let the vented head supply the airflow while you control the lift.
Move continuously. A small rocking motion can help the roots separate from the scalp, but avoid wrapping the hair tightly around the brush at this early stage. Your first goal is a dry, supported root—not a fully rolled curl.
Step 3: Guide the mid-lengths with steady tension
Once the root area is mostly dry, keep the brush beneath the hair and draw it slowly toward the ends. Use enough tension to keep the section organized, not enough to stretch the scalp or bend the bristles. The brush, hair, and airflow should travel as one system. If the dryer remains behind while the brush races ahead, the section will not dry evenly.
For a smoother finish, keep the section flat across the brush and use longer passes. For more body, lift the section higher as it travels over the brush. Repeat only as needed, and reduce the section size if the hair remains damp rather than automatically increasing the heat.
Step 4: Shape the ends deliberately
Decide where you want the ends to go before you rotate the brush. Roll under for a polished inward curve, turn outward for a soft flip, or guide the section straight through for minimal bend. Use a partial rotation rather than winding the entire length tightly around the brush. This keeps the release simple and reduces the chance of tangling.
Face-framing pieces often look more open when directed away from the face. Hold the section at a diagonal, guide the brush outward, and shape only the lower portion. The result should be movement rather than a compact ringlet.
Step 5: Cool the section before releasing the shape
When the section is dry, use a cool-shot function if available or pause briefly while maintaining the curve. Cooling is not a guarantee of all-day hold, but it gives the warm, flexible section time to settle into the direction you created. Release by unwinding the brush in the reverse direction. Do not drag it sideways through a wrapped section.
Step 6: Continue upward with consistent section size
Release the next horizontal layer and repeat the same root-to-end sequence. Working methodically prevents you from mixing finished sections with damp hair. At the crown, direct sections upward or slightly forward for lift. If the crown becomes too round, use less rotation and guide the brush more vertically through the ends.
Step 7: Style the front pieces last
The front cools quickly and has the greatest visual impact, so save it until your technique is settled. Divide the fringe or face frame into smaller sections. Direct them away from the face for an open shape, forward for a softer curtain effect, or downward for a smoother finish. Keep the tool moving and maintain a comfortable distance from the skin.
Step 8: Let the full blowout cool, then finish lightly
Give the completed style a few minutes before separating or brushing it. Use fingers for a more defined, bouncy result or a soft brush for a blended finish. If needed, smooth a very small amount of finishing product over the ends and surface. Avoid flattening the roots with heavy oil or repeatedly running your hands through the hair while it is still warm.

Separate Dryer and Round Brush vs Hot-Air Brush
You can create a round brush blowout with either setup. The correct choice depends on coordination, the finish you want, and the instructions for your tools.
| Method | How it works | Practical advantage | Watch for |
|---|---|---|---|
| Separate dryer + round brush | One hand controls the brush while the other aligns the dryer nozzle. | Independent control of airflow angle, distance, and brush rotation. | Requires coordination and consistent nozzle direction. |
| Integrated hot-air brush | Airflow passes through or around the brush on one powered handle. | One-hand control and fewer moving tools around the section. | Starting moisture and approved settings vary by model. |
| Multi-styler brush attachment | A brush head attaches to a powered base that can also accept other styling heads. | Useful when the routine alternates among drying, smoothing, volume, and curls. | Attach, remove, and clean components only as directed. |
If you want a broader category explanation, read what a hot air styler is. This tutorial deliberately stays focused on the round brush blowout rather than comparing every available attachment.
Adjust the Technique for Your Hair Length, Density, and Texture
Short hair and shorter layers
Use smaller sections and avoid an oversized brush that cannot sit beneath the root area. A smaller round form provides more control around the nape, fringe, and layered ends. Keep rotations partial so short hair does not wind too tightly. For more targeted ideas, see NuvyCare’s guide to styling short hair without losing shape.
Long hair
Work in more horizontal layers and keep the section narrow enough for the brush. Dry roots and upper mid-lengths first, then give the ends their final bend. Trying to roll an entire long section from ends to roots can trap hair around the brush. If you want a stronger curve, shape only the lower third and allow it to cool before releasing.
Fine or low-density hair
Prioritize clean roots, lightweight products, and upward direction. Large, heavy sections can collapse before they cool. Use modest tension and avoid coating the root area with oil. For a fuller silhouette, change the direction of neighboring sections and explore these additional ideas for adding volume to fine hair without teasing.
Thick or dense hair
Make more sections rather than relying on more heat. The interior of a dense section may remain damp even when the outside feels warm. Clip finished sections away from unfinished hair and check the nape and roots before moving upward. A deliberate sequence usually saves more time than repeated passes over oversized sections.
Curly or textured hair
Detangle in the way that suits your pattern, begin with well-conditioned hair, and adjust section size and tension rather than forcing the brush through resistance. The blowout does not need to erase every trace of texture to look polished. Stop if the scalp feels pulled, the brush snags, or the section becomes excessively hot. Hair history, porosity, density, and previous chemical processing all affect how much manipulation is appropriate.
Eight Round Brush Blowout Mistakes—and How to Fix Them
- Starting with dripping hair. Towel-blot and pre-dry as your tool instructions allow. A saturated section takes longer to shape and encourages repeated passes.
- Using sections wider than the brush. Hair spills off both sides, airflow becomes uneven, and the center can stay damp. Narrow the section.
- Ignoring the roots. Polished ends cannot compensate for damp, flat roots. Dry and lift the root area before shaping the length.
- Aiming airflow upward. With a separate dryer, align the nozzle from roots toward ends. Random cross-direction airflow can make the surface look less controlled.
- Using maximum tension. More pulling is not the same as better control. Use gentle, steady tension and stop if the scalp feels uncomfortable.
- Wrapping too much hair around the brush. One partial rotation is often enough for the ends. Deep wrapping increases the chance of tangling.
- Skipping the cool-down. Give each section time to settle before brushing it together with the rest of the hair.
- Trying to fix moisture with more heat. If a section stays damp, make it smaller, improve airflow alignment, and keep the tool moving instead of holding higher heat in one place.
Using the NuvyCare Vorta for a Round Brush Blowout
The NuvyCare 5 in 1 Multi-Styler, also presented as the Vorta Multi-Styler, combines a compact powered handle with interchangeable styling attachments. The live product page describes drying, curling, smoothing, and volumizing functions, LayerStream™ airflow, three airflow speeds, a Cool Shot control, and a detachable inlet filter.
For this tutorial, the relevant attachment is the vented round brush. Use it on the starting moisture level permitted by the supplied instructions, begin conservatively, and adjust airflow to the needs of the section. Work under the hair for root lift, guide the brush and airflow together through the mid-lengths, then use the Cool Shot control to help the finished section settle before release.
The multi-styler format is especially practical when you want to pre-dry, create a rounded blowout, and switch to another finish without keeping a separate powered tool for every stage. It does not remove the need for sectioning, detangling, careful heat use, or cleaning the air intake. For broader attachment considerations, read whether a 5-in-1 hair styler fits your routine.
Round Brush Blowout Checklist
- Hair is clean, conditioned, gently towel-blotted, and detangled.
- Heat protectant is applied according to its label.
- Starting moisture matches the tool manufacturer’s instructions.
- Hair is divided into clean horizontal layers.
- Each working section is narrower than the brush surface.
- Roots are dried and lifted before the ends are shaped.
- The brush and airflow move together from roots toward ends.
- Tension is steady but comfortable.
- The ends are only partially rotated to avoid tangling.
- Every section is cooled before it is separated or brushed out.
Frequently Asked Questions
How wet should hair be for a round brush blowout?
Hair should not be dripping. With a separate dryer and brush, many people remove most excess moisture before shaping. With a hot-air brush or multi-styler, use the starting moisture level stated by the manufacturer. Towel-blot gently, detangle, and reduce the section size if the interior stays damp.
How do I get root volume with a round brush?
Place the brush beneath a narrow section close to the roots, lift the section upward or slightly forward, and direct airflow along the hair. Dry the root area before moving through the length, then allow the section to cool while it is still elevated.
Should I roll the hair all the way around the brush?
Usually not. For a blowout, one partial rotation at the ends is often enough to create a curve. Wrapping a large section repeatedly around the brush can make release difficult and increase tangling. Use smaller sections when you want a stronger bend.
Can I do a round brush blowout with a hot-air brush?
Yes, if the tool is designed for that use. An integrated hot-air brush combines the airflow and brush on one handle. The same fundamentals still apply: suitable starting moisture, clean sections, gentle tension, root-to-end movement, and cooling before release.
Why does my blowout look flat?
Common causes include roots that were not fully dry, sections that were too large, heavy product near the scalp, downward brush direction, or brushing the style out before it cooled. Start at the roots, lift each section, and keep finished hair undisturbed until cool.
Why does my round brush get stuck?
The section may be too wide, insufficiently detangled, or wrapped too many times. Stop the tool, release tension, and unwind in the reverse direction. Do not pull forcefully. Next time, use a narrower section and shape the ends with a partial turn rather than a full roll.
A Better Blowout Comes From Sequence, Not Speed
A successful round brush blowout is less about dramatic wrist movements and more about doing ordinary steps in the right order. Prepare the hair, work in sections, dry the roots first, guide the brush and airflow together, shape the ends only after the lengths are controlled, and cool each section before release. Start conservatively, follow your tool’s instructions, and make the section smaller whenever the technique feels difficult.
Once that rhythm becomes consistent, you can change the direction at the crown, face frame, or ends without rebuilding the entire routine. Keep this page as the step-by-step method, and use the brush-selection guide when you need help choosing the round or oval shape for a particular finish.
Share:
How to Straighten Curly Hair: A Step-by-Step Routine
Foil Shaver for Face: Who It Suits and What to Look For