
How to Straighten Curly Hair: A Step-by-Step Routine
Learning how to straighten curly hair is less about forcing every curl flat and more about controlling moisture, section size, heat, tension, and pass speed. When those five parts work together, the hair is easier to smooth and you are less likely to keep going over the same area.
The right starting point depends on your tool. A conventional flat iron is generally meant for fully dry hair. A purpose-built wet-to-dry straightener can begin on towel-dried, damp hair when its manufacturer specifically allows it. This guide explains both routes, with a detailed routine for curly hair and practical adjustments for loose curls, dense curls, and coils.

Quick answer: condition and detangle first, remove excess water, apply a suitable heat protectant, divide the hair into small sections, start with a sensible setting, and make slow continuous passes without stopping in one place. Let each section cool before deciding whether it needs another pass.
Before straightening curly hair, choose the correct starting condition
Do not decide whether your hair should be damp or dry based on a social-media technique. Decide according to the tool in your hand.
- Conventional flat iron: use it on fully dry hair unless the manufacturer explicitly states that it is designed for damp-hair use.
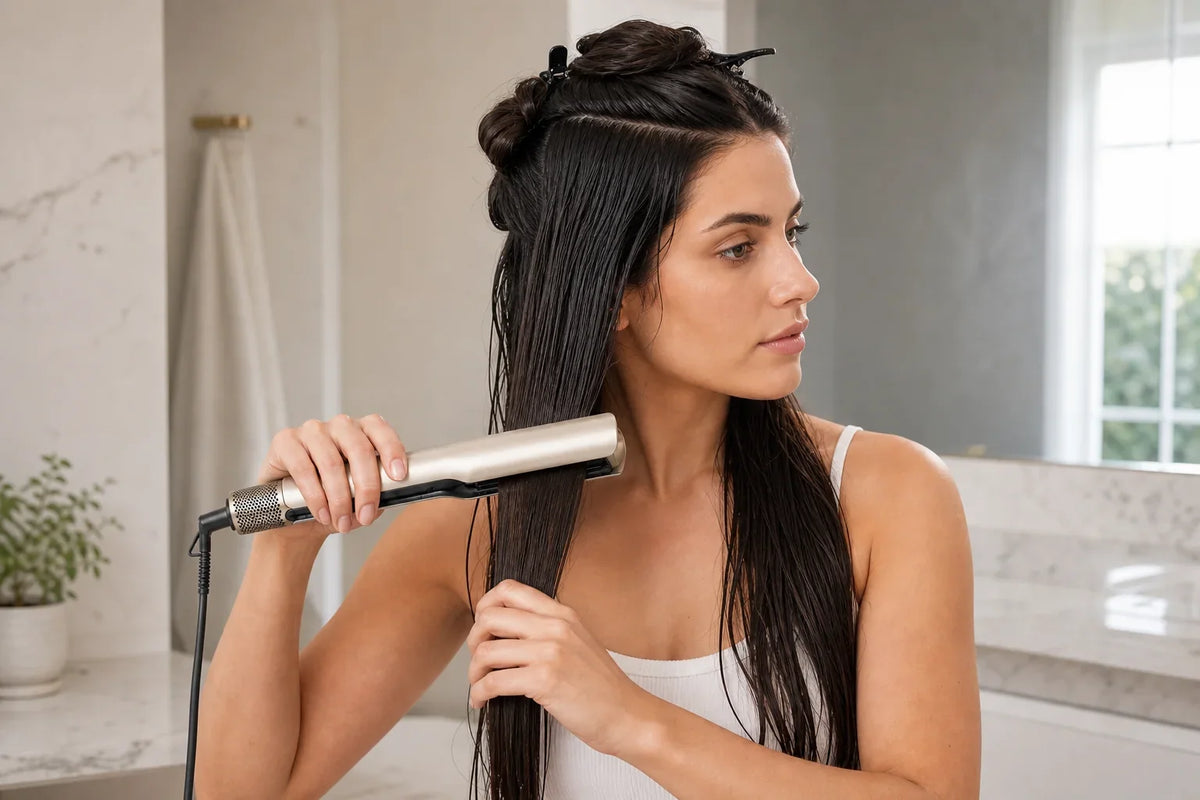
- Wet-to-dry straightener: begin with towel-dried, evenly damp hair and follow the device instructions. Damp does not mean dripping.
- Fragile or compromised hair: if your hair is breaking, severely overprocessed, recently relaxed, or unusually brittle, postpone heat styling and seek individual advice from a qualified stylist or dermatologist.
The American Academy of Dermatology recommends limiting excessive heat, using low or medium settings when possible, and handling textured hair gently. Its healthy-hair guidance also recommends using a wide-tooth comb for damp, curly hair and a heat-protecting product when heat styling.
If you are comparing tool types, read Flat Iron vs Hair Straightener. For a deeper explanation of the damp-hair route, see what a wet-to-dry hair straightener is before beginning this technique guide.
What you need for a controlled straightening routine
Keep the setup simple. Too many products can leave residue, make damp hair slower to dry, or hide whether a section is actually finished.
- A gentle shampoo and conditioner suitable for your hair
- A microfiber towel or soft cotton T-shirt
- A wide-tooth comb or a detangling tool designed for curls
- Four to six sectioning clips
- A heat protectant labeled for your hair type and starting condition
- A straightening tool whose instructions match the routine
- An optional lightweight finishing serum for the ends
Curly hair can be more prone to dryness and breakage, so preparation matters as much as the straightening pass. Work out tangles before applying tension with a heated tool. If a comb cannot move through the section comfortably, the straightener should not be asked to do the detangling.

How to straighten curly hair step by step
Step 1: Cleanse and condition without rough handling
Start with hair that is clean enough to style evenly. Concentrate shampoo at the scalp rather than aggressively rubbing the lengths together. Apply conditioner through the lengths, giving extra attention to dry areas and the ends. While the conditioner provides slip, begin separating knots with your fingers or a wide-tooth comb.
Detangle from the ends upward. Starting at the roots can push several small tangles into one larger knot. When the comb reaches from roots to ends without catching, rinse carefully and keep the hair organized rather than piling it on top of the head.
Step 2: Remove excess water
Gently squeeze water from the hair, then blot or wrap it in a microfiber towel. Avoid vigorous rubbing. If you are using a conventional flat iron, continue drying until the hair is fully dry. If you are using a wet-to-dry tool approved for damp hair, stop when the hair is evenly damp but no longer dripping.
Uneven moisture creates uneven results. The outer layer may feel nearly dry while the nape and inner sections remain wet. Check those hidden areas before turning on the tool.
Step 3: Apply heat protection evenly
Choose a protectant that is intended for heat styling and compatible with damp or dry hair, depending on your route. Follow its label rather than assuming that more product gives more protection. Apply in sections and distribute it with your hands or a wide-tooth comb.
Avoid coating the hair with heavy oil before applying heat unless the oil's instructions specifically support that use. Too much product can weigh down the finish, create buildup, or make it difficult to tell whether damp hair is fully dry.
Step 4: Divide the hair into workable zones
Create a center part from the forehead to the nape, then divide each side horizontally. Four sections may be enough for loose or medium-density curls. Dense curls and coils often benefit from six or more. Clip each section without pulling tightly at the scalp.
Begin at the nape. From the first zone, release a subsection narrow enough to sit evenly inside the tool. A section that bulges beyond the working surface is too large. Smaller subsections may feel slower at first, but they reduce hidden damp spots and unnecessary repeat passes.
Step 5: Select a sensible setting
Use the manufacturer's guidance for your tool and your hair. Fine, lightened, relaxed, or fragile hair generally calls for a more conservative approach. Thick or coarse hair may need smaller sections, slower movement, or an appropriate higher setting—but not automatically the maximum.
The lowest setting that produces the intended result with controlled technique is a practical place to begin. If the first section is not smooth or dry, check moisture level, section size, and pass speed before raising the heat. The hair straightener temperature guide explains why hair condition and density matter more than copying one universal number.

Step 6: Work from the roots with gentle tension
Hold the subsection taut enough to organize the strands, but not so tightly that the scalp feels pulled. Position the tool close to the roots without touching the scalp. Close it gently and begin moving immediately.
For puffy roots, the solution is usually a smaller subsection and a clean starting angle—not clamping harder. Keep your wrist neutral so the hair enters and leaves the tool in a straight line. At the hairline, use extra caution and smaller pieces because those strands are often finer.
Step 7: Make one slow, continuous pass
Glide from roots to ends at a consistent speed. Do not stop midway or repeatedly tap the same spot. A smooth pass distributes the work more evenly than several fast passes. If you use a comb-chase technique, make sure the comb moves easily and stays far enough ahead of the hot surface to avoid snagging.
With a wet-to-dry device, listen and feel for changes as moisture leaves the section, but do not rely on sound alone. When released, the hair should feel dry and evenly smooth. With a conventional flat iron, there should be no remaining moisture before the pass begins.
Step 8: Let the section cool before judging it
Release the section and let it cool for several seconds. Warm hair can feel softer and flatter than it will after it settles. Once cool, check the roots, middle, and ends. If one area needs another pass, correct only that area rather than reheating the entire strand.
Keep finished hair separate from unfinished curls. When every section is complete, allow the full head to cool before applying a small amount of lightweight finishing product to the mid-lengths and ends.
How to adjust the technique for different curl patterns
Loose curls and waves
Loose curls may straighten with fewer sections and lighter tension. Preserve movement by reducing pressure near the ends and guiding the tool into a very slight bend instead of pulling every strand completely flat.
Dense curls
Density changes how much hair is inside each subsection. Even when individual strands are fine, a dense head of hair may need many narrow sections. Focus on an orderly root-to-end pattern so no damp or textured areas are hidden beneath the finished surface.
Tight curls and coils
Tight textures often need more time for conditioning, detangling, and sectioning. Maintain moisture in the hair-care routine, but do not overload the styling section with product. Gentle, even tension and small sections are more useful than repeatedly increasing pressure or heat.
Fine, color-treated, or previously processed curls
Use a cautious setting, light tension, and as few passes as practical. If the hair shows breakage or feels unusually fragile, straightening can wait. The AAD's hair-styling guidance notes that excessive heat can damage hair and recommends reducing heat-tool exposure.
Damp-to-straight vs. dry-then-straighten
| Routine | Starting condition | Best fit | Main caution |
|---|---|---|---|
| Wet-to-dry straightening | Towel-dried, evenly damp hair | A streamlined wash-day routine | Use only a tool designed for damp hair; do not begin dripping wet |
| Traditional flat ironing | Fully dry hair | Dry-hair finishing and precise touch-ups | Do not trap moisture against plates not designed for wet use |
The NuvyCare Wet-to-Dry Hair Straightener is officially described as using high-speed airflow and precise temperature control to help transform damp hair into a smooth, polished style while drying, straightening, and smoothing in one step. The product page does not publish a universal temperature prescription, so use its instructions and adjust technique rather than inventing one setting for every curl pattern.
Common mistakes when straightening curly hair
- Skipping full detangling: a heated tool should smooth an organized section, not pull through knots.
- Using the wrong moisture level: ordinary flat irons are generally for dry hair; approved wet-to-dry tools start on towel-dried hair.
- Making sections too large: the outside may look straight while the center stays damp or textured.
- Turning to maximum heat first: test section size and pass speed before increasing the setting.
- Clamping hard: controlled tension and movement matter more than squeezing the tool.
- Rushing the roots: narrow root sections prevent puffiness more effectively than repeated full-length passes.
- Restyling warm hair immediately: let the section cool before deciding it needs more work.
- Using too much finishing product: heavy layers can flatten movement and create faster buildup on the tool.
Why curly hair may turn frizzy after straightening
Frizz after straightening is not always a sign that the tool failed. Common causes include hidden moisture at the roots, oversized sections, incomplete detangling, a humid environment, or repeatedly passing over hair after the finish has already formed.
Check the nape and the area behind the ears first. Those zones are easy to miss and often hold moisture. Then review your section size. If the inner strands were not exposed evenly, make the next section thinner rather than simply turning up the heat.
Hair condition also matters. A rough or damaged surface can look frizzy even when the strand is straight. Straightening changes the shape temporarily; it does not repair existing damage. Keep conditioning and gentle handling in the routine, and do not treat a glass-like finish as the only successful outcome.
How to help a straight style last
- Finish every section completely and let the hair cool before touching it repeatedly.
- Use a light finishing product only where needed, usually through the mid-lengths and ends.
- Avoid exposing the finished hair to shower steam or outdoor moisture immediately after styling.
- At night, reduce friction with a loose wrap or another method appropriate for your hair.
- For small next-day corrections, target only the affected area instead of reheating the entire head.
People with very thick hair can also compare the feature priorities in the straightener guide for thick hair. If you are building a broader home setup, the guide to professional hair styling tools for home use can help separate essential tools from optional ones.
Streamline a damp-to-smooth routine
For people who regularly wash and straighten curly hair in the same session, an approved wet-to-dry tool can remove the handoff between a separate drying step and straightening. NuvyCare's model combines high-speed airflow with precise temperature control and is designed to dry, straighten, and smooth damp hair in one step.
Frequently asked questions
Can you straighten curly hair without damage?
No heated styling method can guarantee damage-free results. You can reduce avoidable stress by detangling first, using a suitable heat protectant, choosing a sensible setting, working in small sections, limiting repeat passes, and straightening less frequently.
Should curly hair be wet or dry before straightening?
It depends on the tool. A conventional flat iron is generally intended for fully dry hair. A wet-to-dry straightener may be used on towel-dried, damp hair only when the manufacturer specifically approves that use.
How many passes should you make on curly hair?
Use as few passes as needed for an even result. One slow, controlled pass on a small section is often more useful than several rushed passes. Let the hair cool before deciding whether a targeted second pass is necessary.
Why is my curly hair still frizzy after straightening?
Possible reasons include hidden moisture, sections that were too large, uneven detangling, humidity, heavy product buildup, or existing dryness and damage. Check the nape and inner layers before increasing the heat.
What heat setting should I use for curly hair?
Follow the tool manufacturer's guidance and consider your hair's condition, strand thickness, density, and chemical history. Begin conservatively and test one small section. Do not assume every curl pattern needs the highest setting.
Can the NuvyCare Wet-to-Dry Hair Straightener be used on damp curly hair?
Yes. The official NuvyCare product page describes it as using high-speed airflow and precise temperature control to help dry, straighten, and smooth damp hair in one step. Begin with towel-dried hair rather than hair that is still dripping.
For more routines and tool comparisons, browse NuvyCare's hair styling tools or visit the NuvyCare hair-care blog.
Share:
What Is a Floating Head Shaver? How Contouring Blades Follow Your Face
Round Brush Blowout: A Step-by-Step At-Home Technique